MT: Trail Scape
+ Category: Shoe Design
+ Date: January 2015
Objective
Design a hiking shoes that can be used on various trail conditions.
• Light to rough terrain
• Dry to wet terrain
Define Problem & Investigation
• Most shoes are designed for specific activities
• Multiple shoes for various hiking activities
- Hiking boots, Trail shoes, Water shoes
• Injury can occur from a wrong type of shoes
- Blisters, fatigue & muscle cramps
Solutions & Results
• Attachable sole for various terrain
• Waterproof materials
• Aggressive grip and protection
Research:
• Brand strategies
• Styles, types and forms
• Nature vs. menmade pattern
• Common observation
• The users
• User environment
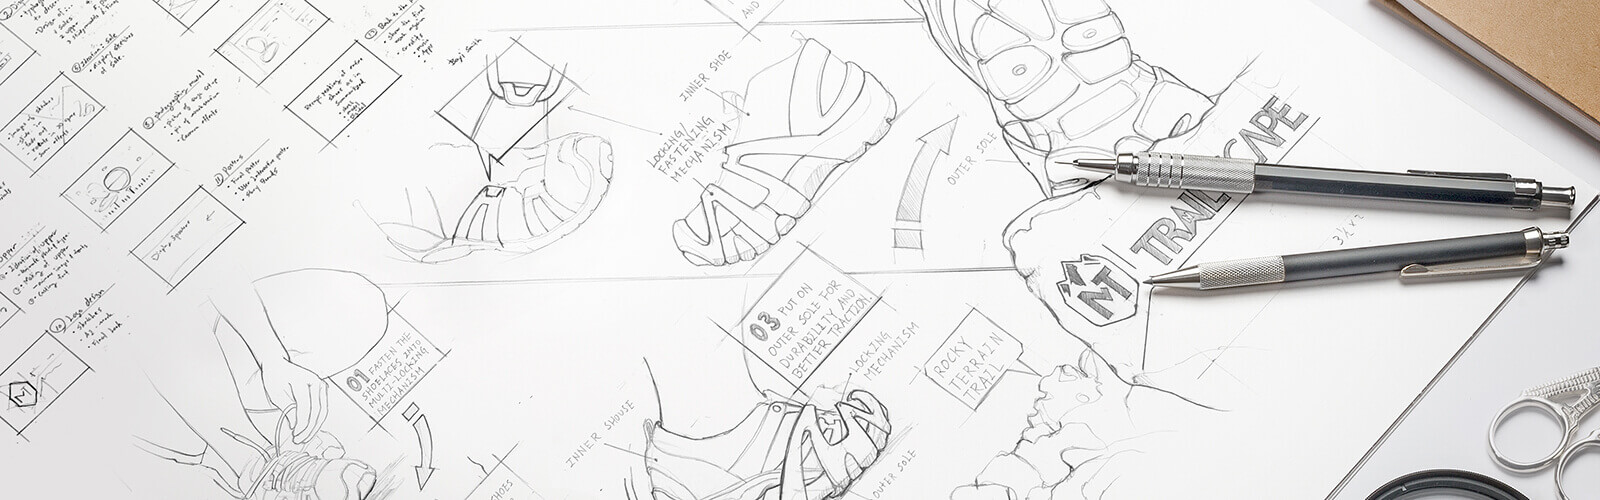

Concept Development
• Sole: Inner, outer, draininage & guard
• Upper: Form, mesh and lacing
• Pattern: Nature vs. men-made
• Attachable sole: Locking system
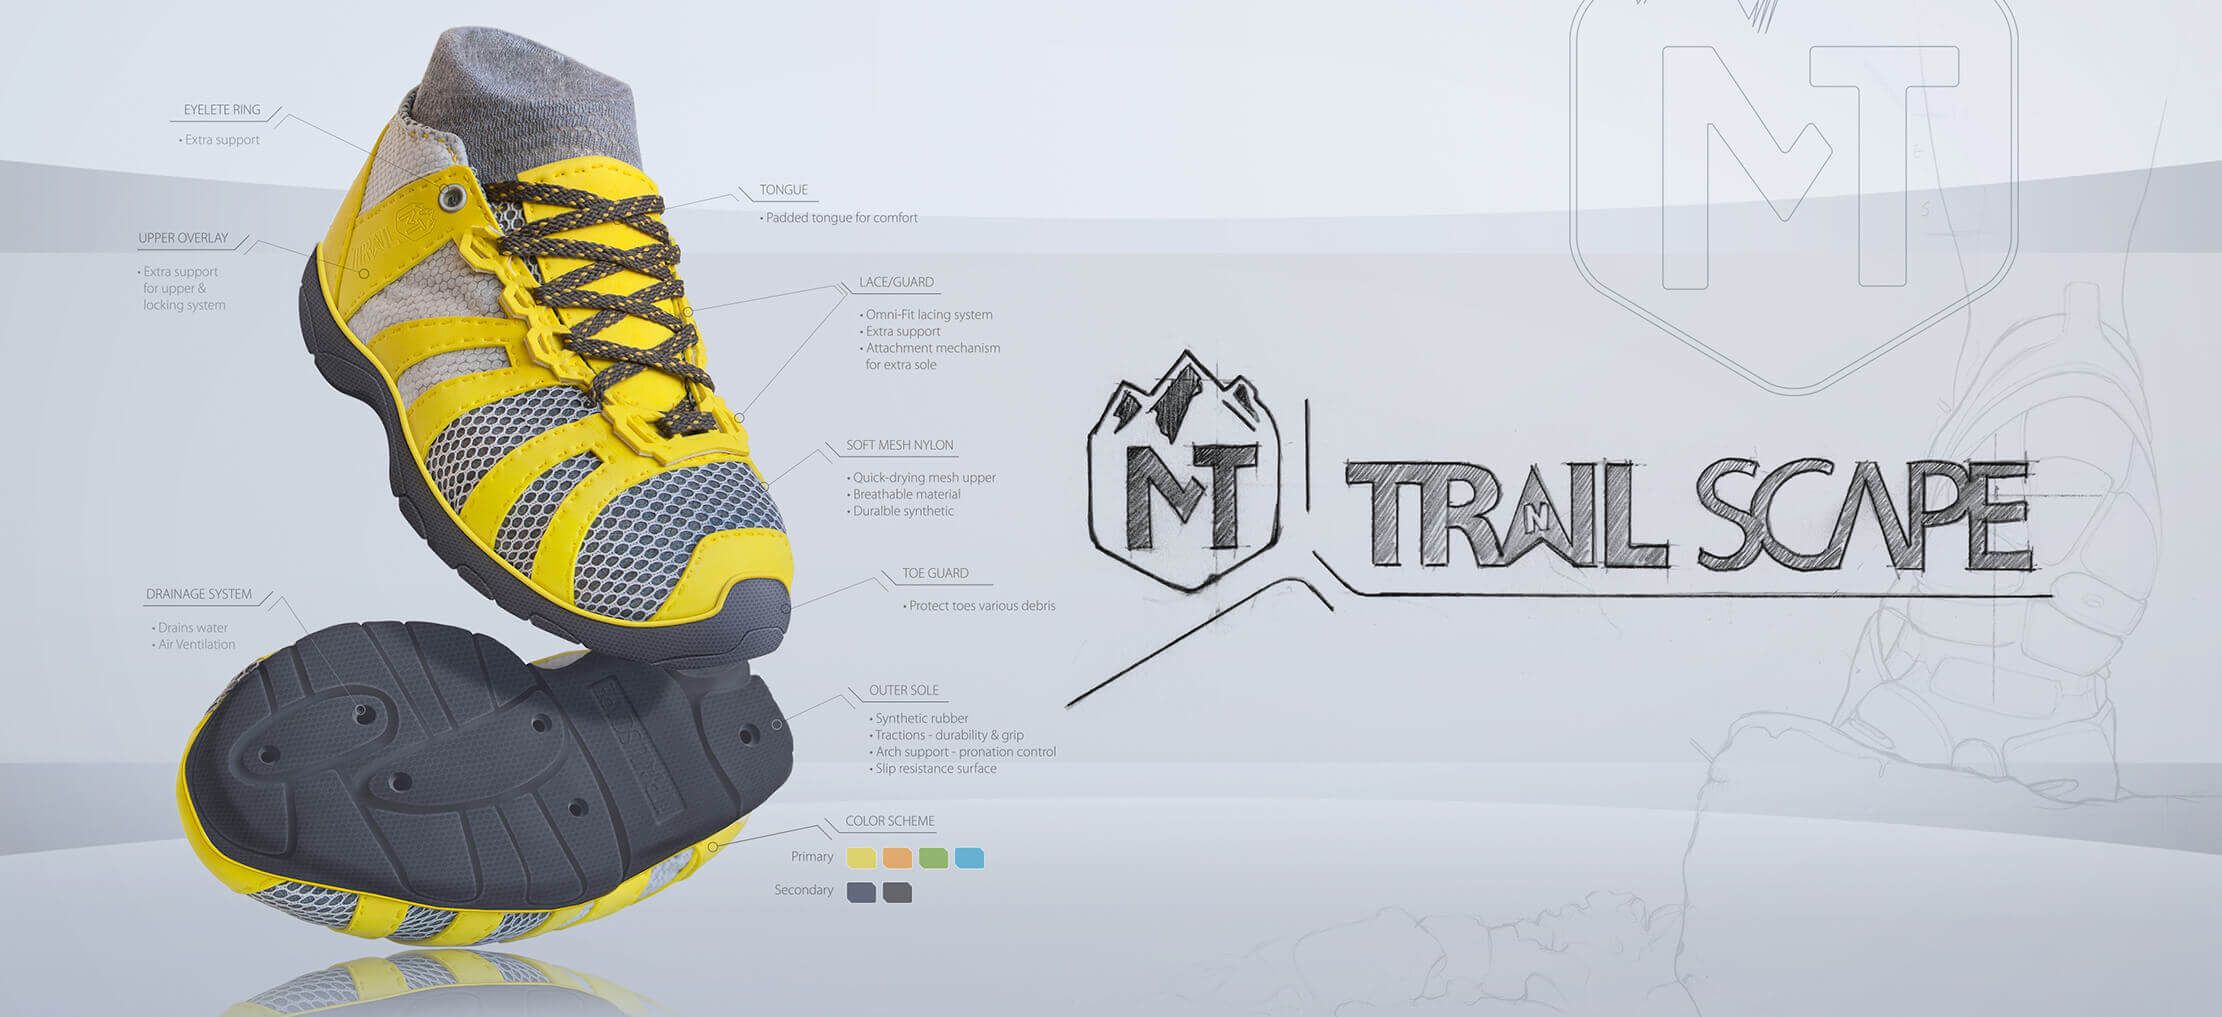
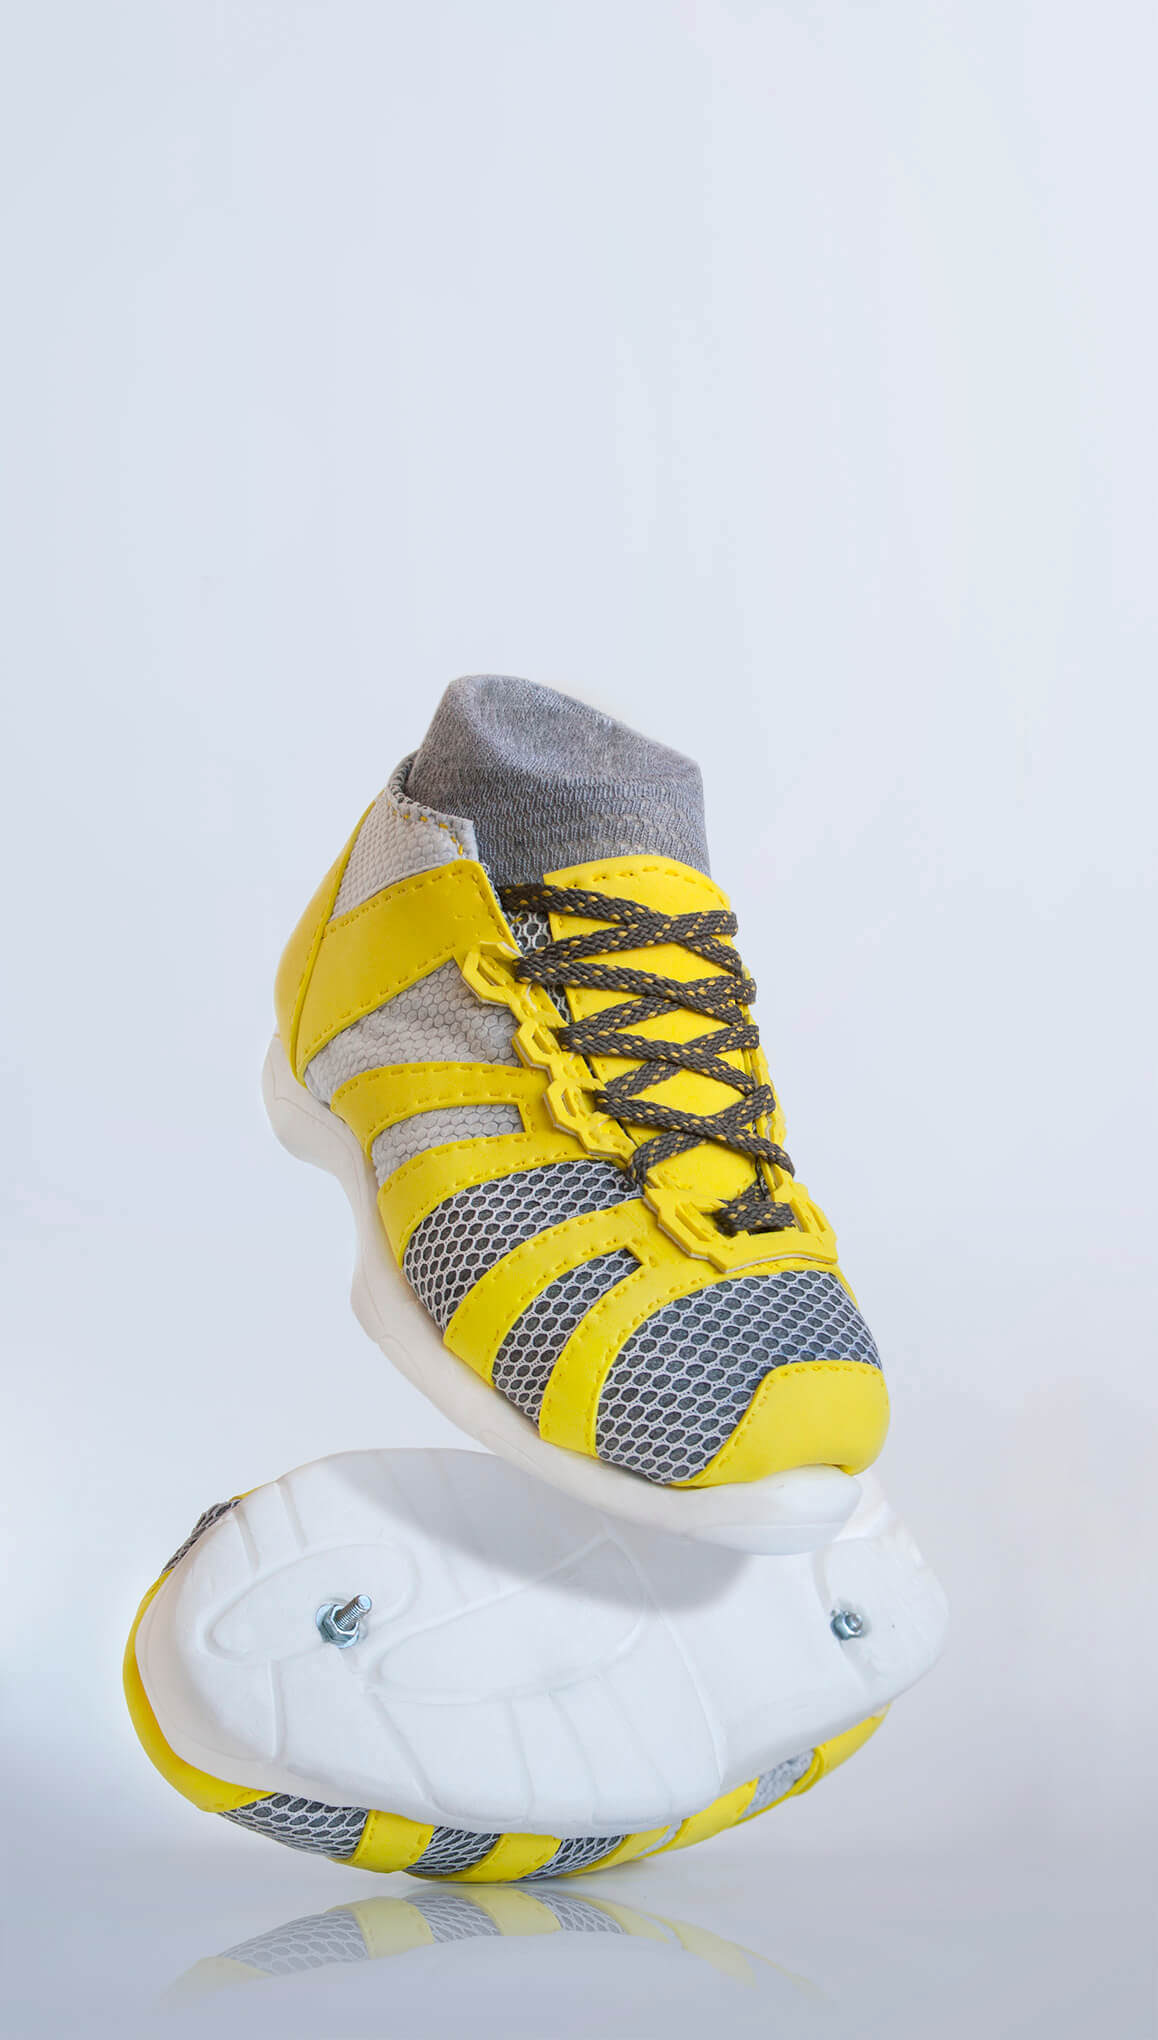
Implemented Features
Several features were implemented to address common issues using hiking shoes.
• Quickly adjustable lacing system
• Formfitting straps
• Stable and flexible platform for protection
• Aggressive tread patterns for easy grip on wet and dry terrain
• Attachable outer sole for more protection
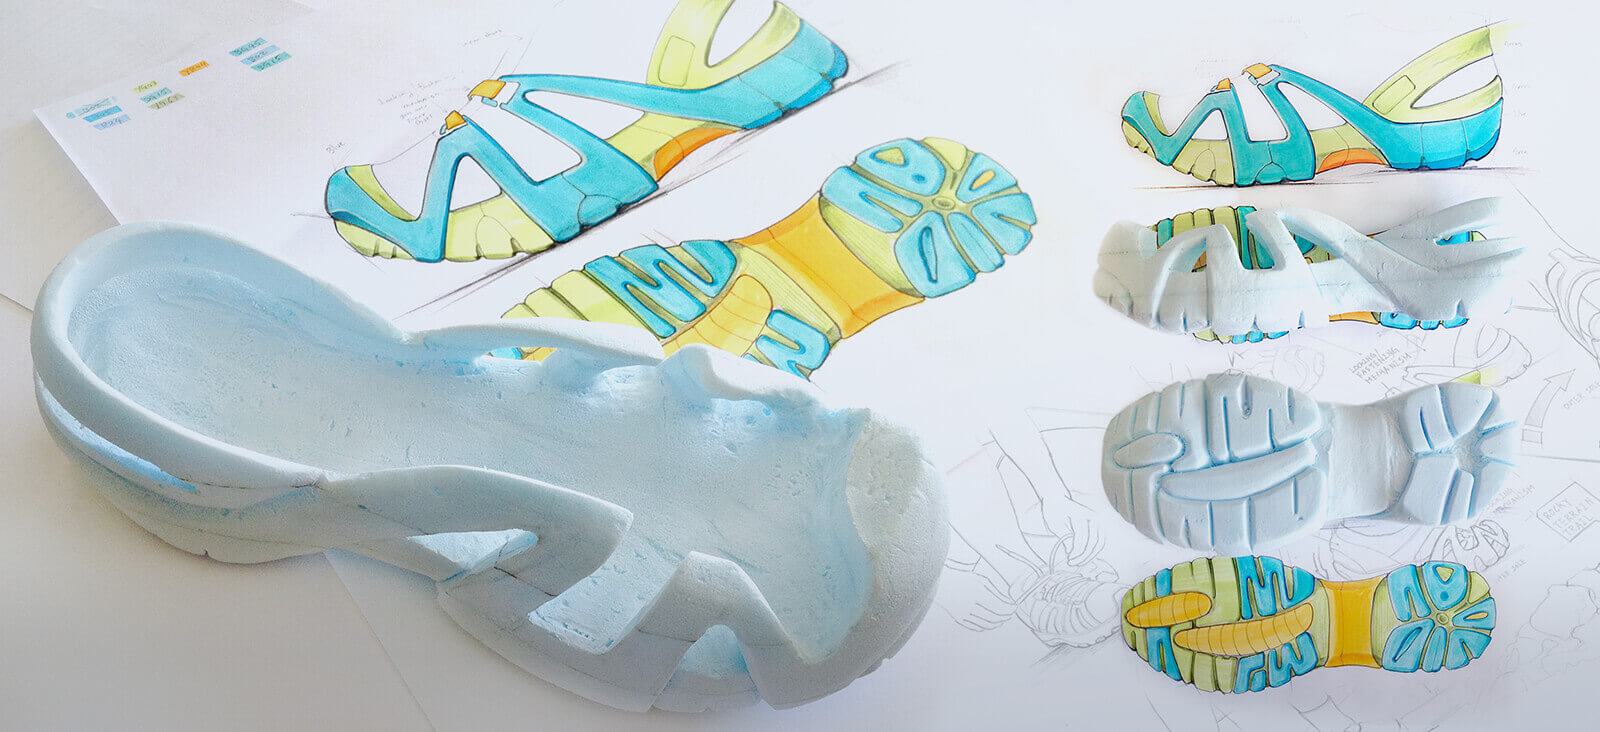
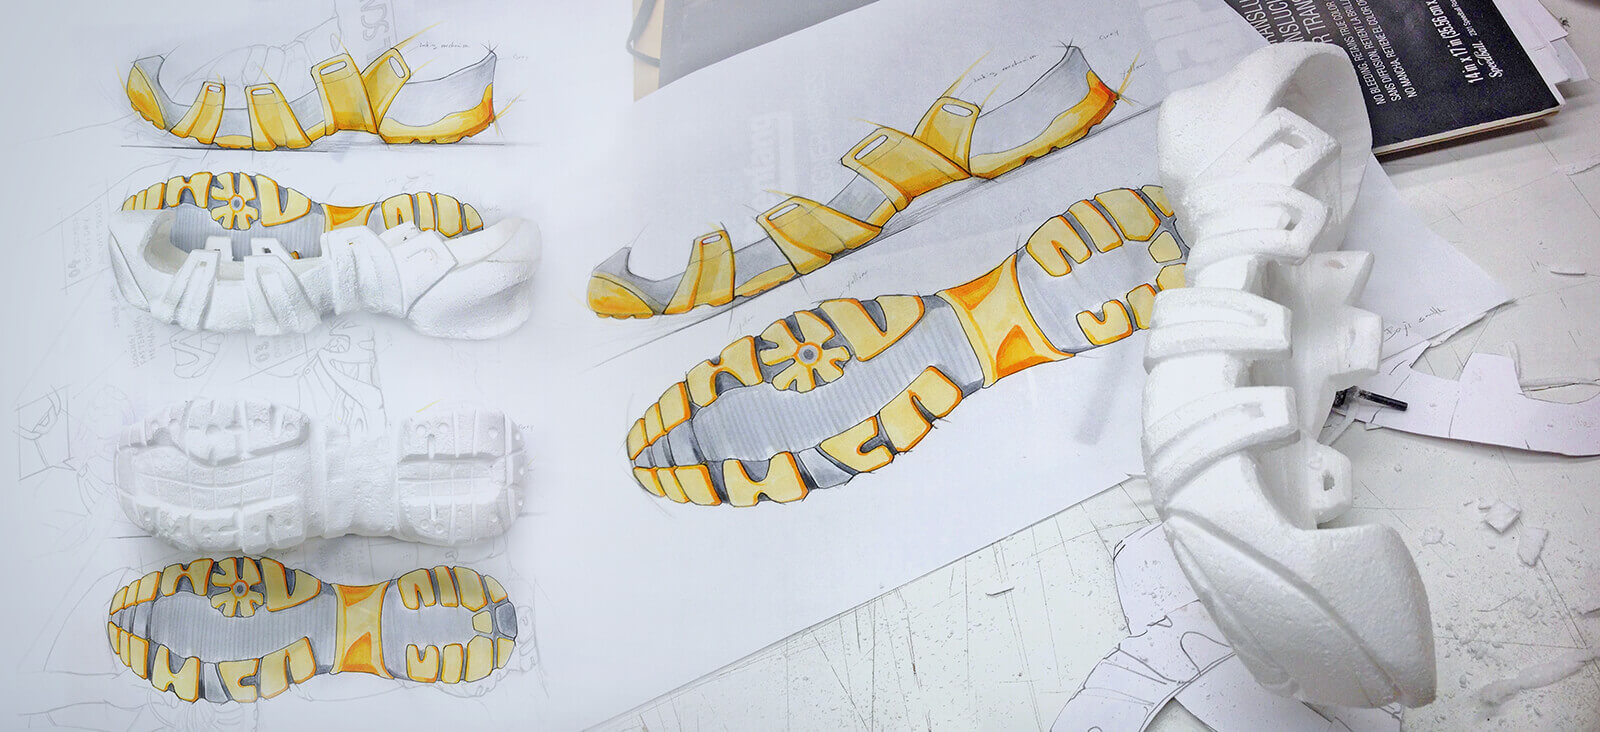
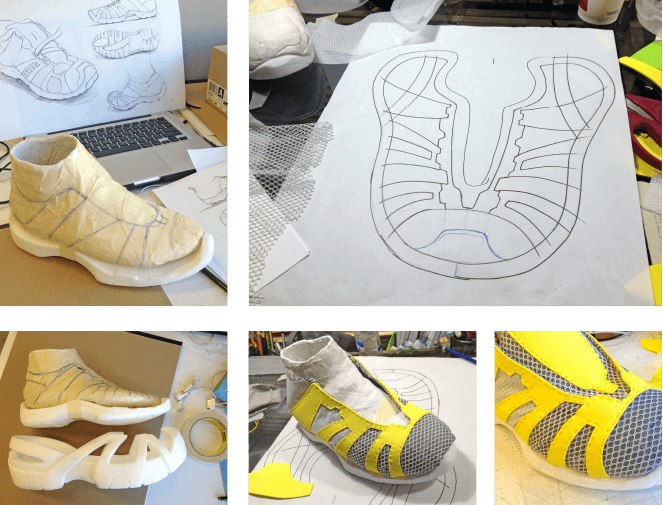
Color & Form Exploration
Rendering: Using markers
Modeling: Using white & blue styrofoam
Color Study
Several color schemes were used to explore for color combinations, age and gender target.
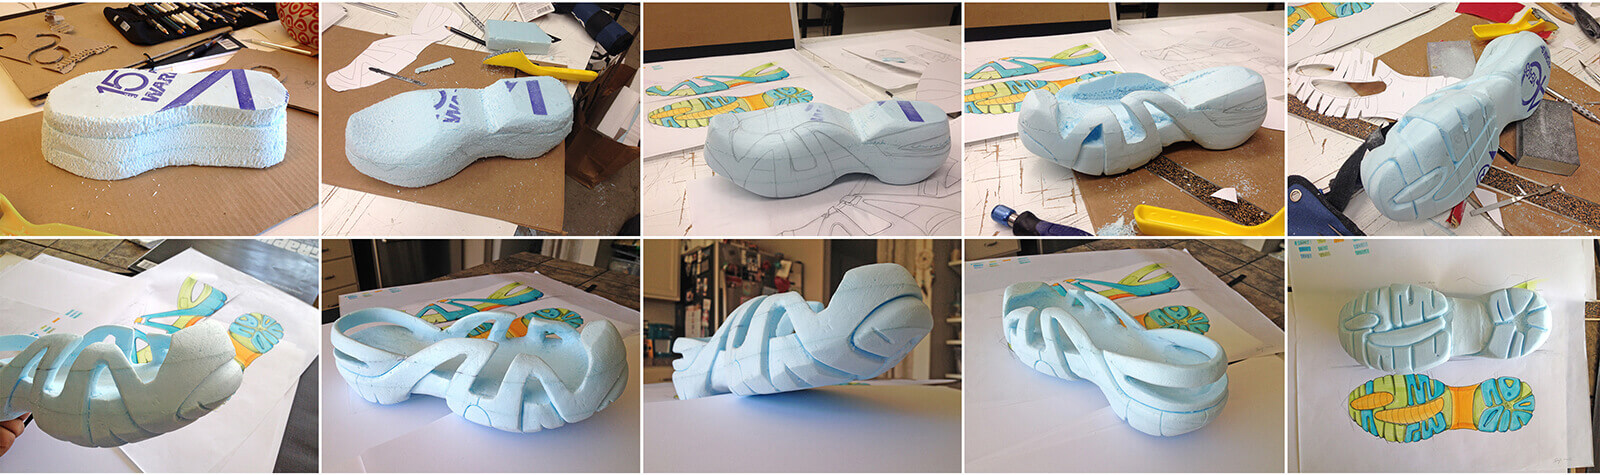
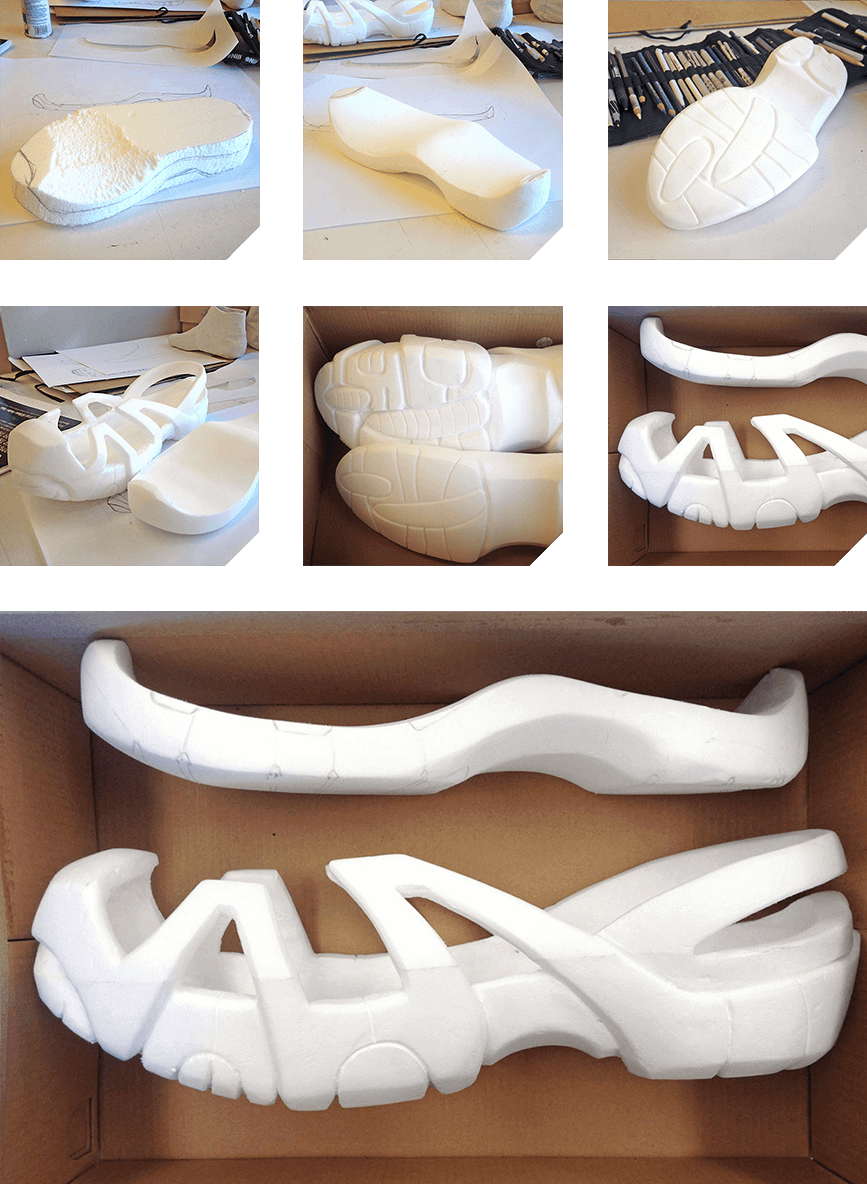
Study Model
Blue and white styrofoams were used for quick form study for further refinement.
Research:
• Inner shoe sole
• Attachable sole
• Locking mechanism


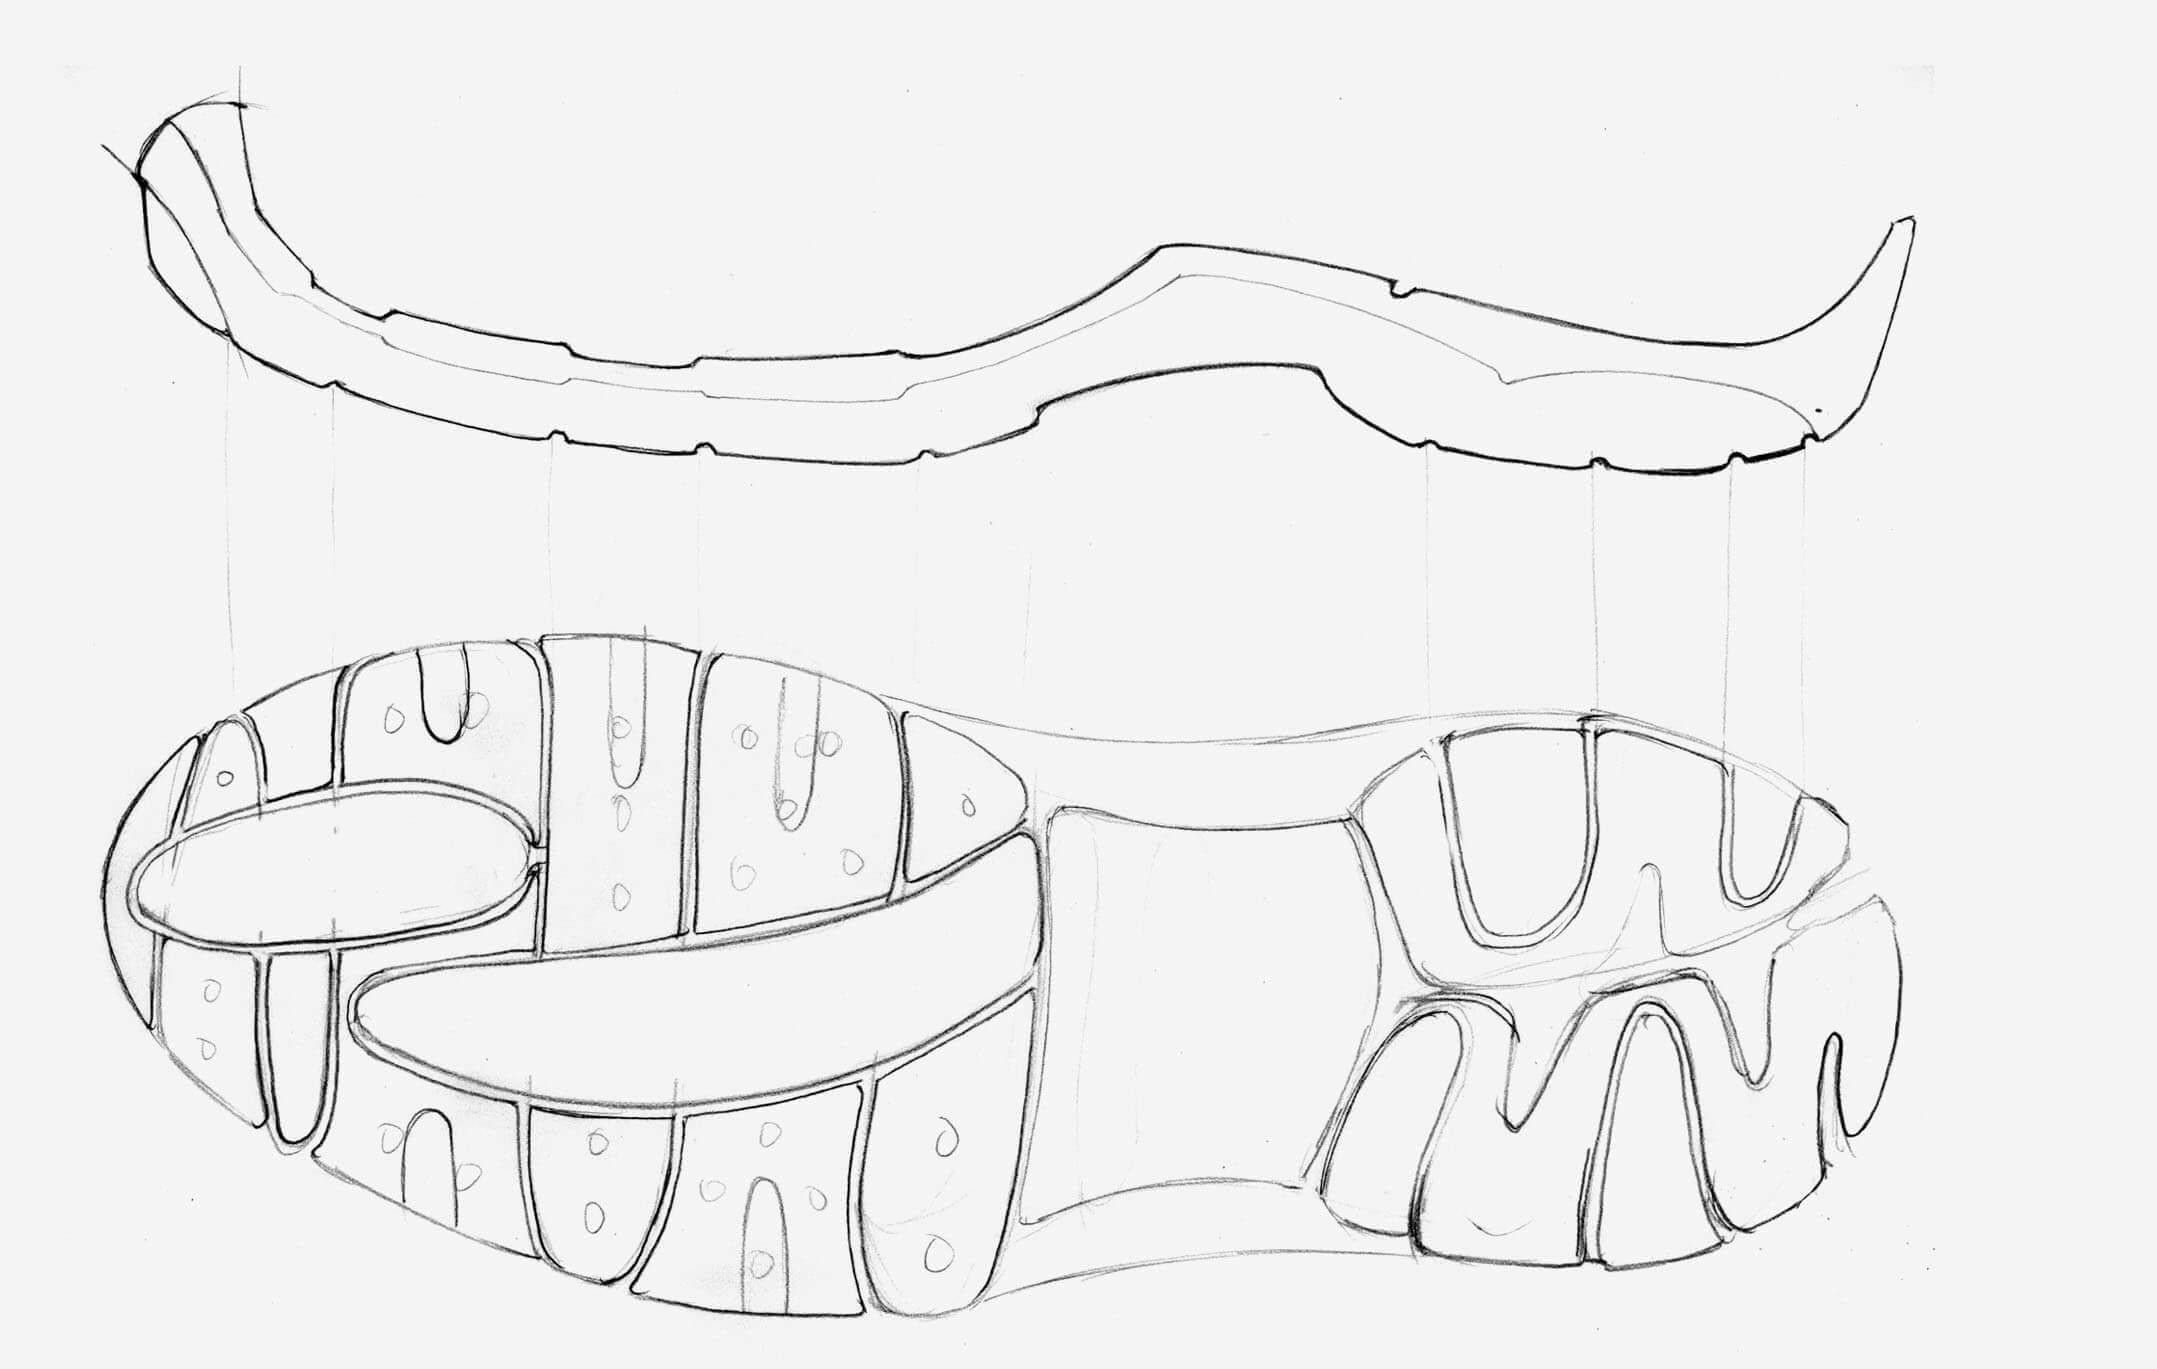
Refined inner and outer soles were made based on the quick study models. Sole's pattern was modified to give more supports in wheel and toe areas, and flexibility in the arch area.
The attachable outer sole is designed based on inner shoe's specs. Outer sole attaches onto inner shoe through locking mechanism.

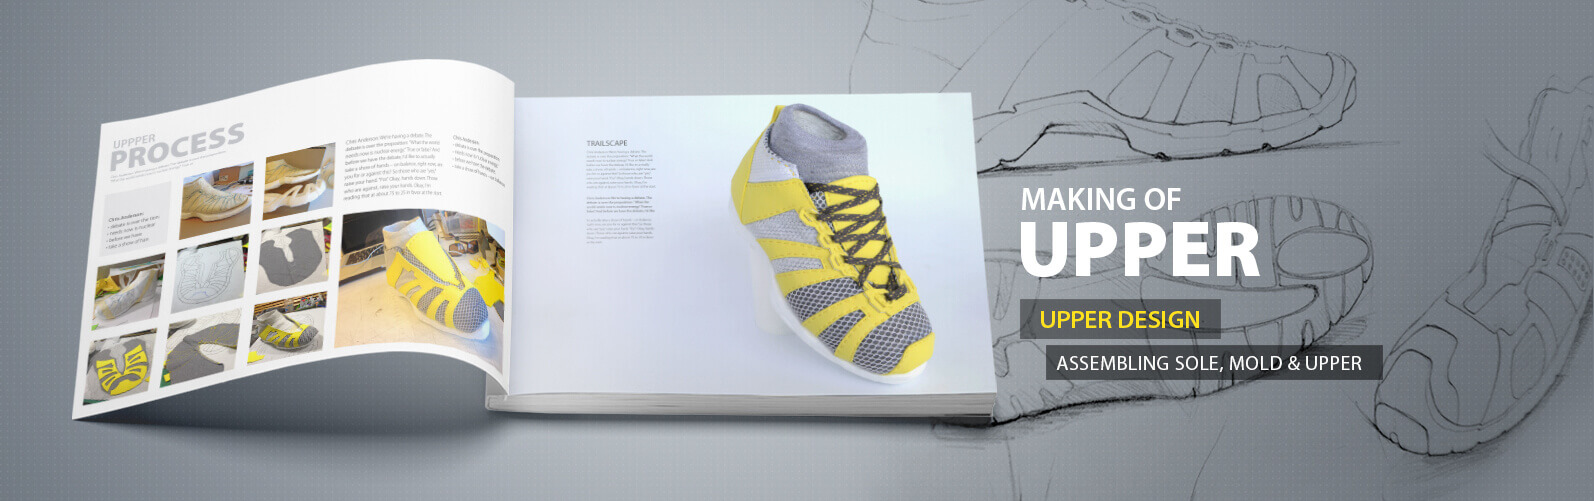
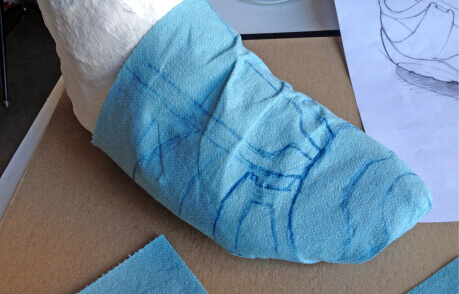
MAKING OF UPPPER PROCESS
The most challenging part of making the upper shoe as intended was using the right materials and achieving the correct form. After creating a mold and covering it with a blank material, the design was drawn onto it to form a template. This template was then used to cut the materials that would later be sewn together. Once the different parts were stitched, the insole and upper mesh were assembled to complete the structure.
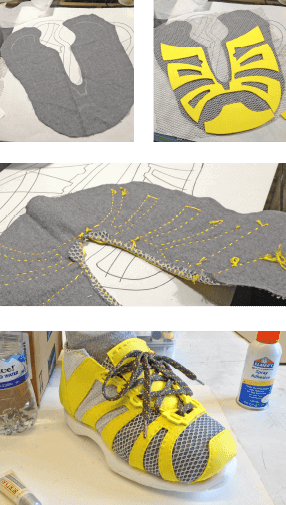
Image editing
• Image composition
• Image editing & adjustments
Let's Connect!
I'd love to connect. Please send me an email. I will respond as soon as possible. Looking forward to hearing from you.
y. Bayi Smith © 2025. All rights reserved.